Finishing the Jazzmaster fret markers

The Milliput Black epoxy putty arrived in the post this morning.

It comes with two cylindrical lumps of “stuff”, one black and one grey. I broke a thumbnail sized piece off each and kneaded them together for about 3-4 minutes.

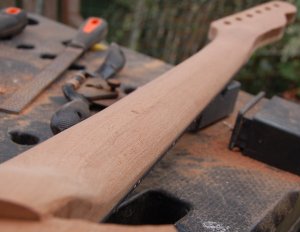
I then rolled it into balls and squidged them into each of the fret markers on the face and side of the neck.

After about 2 hours the putty has started to set and I scrape most of the excess off. After another 2 hours it is ready to file and sand.

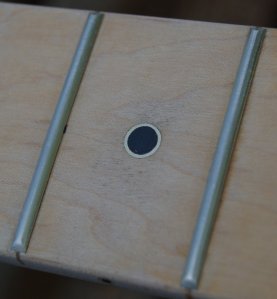
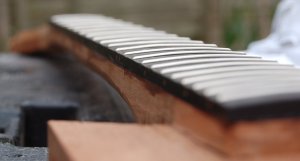
I’m very happy with the appearance although if you look at the close-up you can see where the putty has managed to get into the small marks/flaws in the fretboard. When I next do this I will mask round the markers to minimise the clean up work.

Jazzmaster fretboard markers and control cavity

The plan was to drill out the black plastic fretboard markers and replace them with some black pearl ones (pictured).

As soon as I drilled these out I could see this wasn’t going to work – the holes were 5mm deep and the little inlays were only 1mm thick. Time for a change of tack. I’m going to make markers from brass tube filled with a black epoxy putty called “Milliput” instead. The putty is on order but in the meantime I got started with fitting the sections of brass tube.

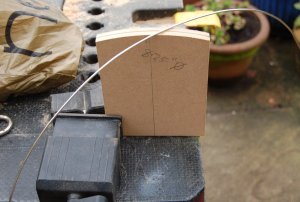
I drilled a 5.5mm deep hole in a piece of MDF and using a hacksaw cut the 6mm tube into small pieces.

I had also bought some 2.5mm brass tube too so that I could make matching side dots. I drilled out the old ones.

With a dab of superglue in each hole I pressed in the brass tubes.

After allowing it to dry I filed the tubes flush with the neck.

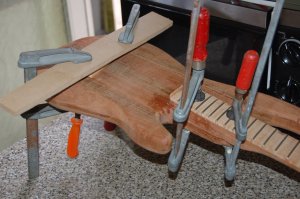
Once that was done I tackled the control cavity. I had marked the locations on the MDF template. I attached this to the body and with a 2mm drill, made a hole right through template and body.

I used a 19mm spade bit to cut the countersink for the knobs, and a 10mm bit for the selector switch.

Once those were marked I could tackle the control cavity from the back. I had made a cover a couple of days ago.

Using the techniques I discussed in detail previously I made a template for the cavity “ledge” and routed that.

I made a smaller template and then routed out the inner cavity.

To finish I check the cavity is deep enough to allow the components to reach through to the front.

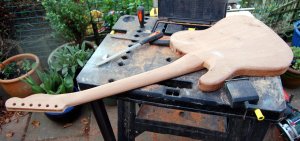
And that is all the work I can do until the pickups arrive. Once I’ve got those in hand I’ll be able to rout their cavities, drill the cable runs, and then glue in the neck. Once the neck is in I can shape the heel and I’ll be on to sanding and finish.

Minibass: Carving the neck and stringing it up

Carving the neck, first with a rasp…

…and then with a spokeshave.

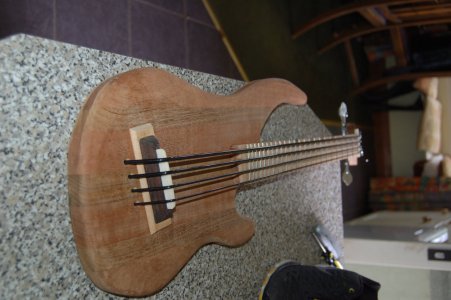
Last night I strung it up (E and G strings) and adjusted the bridge until the intonation was correct. Here are the marks.

I glued the bridge into position and then glued up and clamped in the neck too.

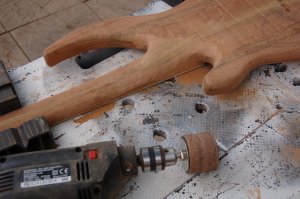
With the spindle sander in the drill I shaped the heel and upper reaches of the neck.

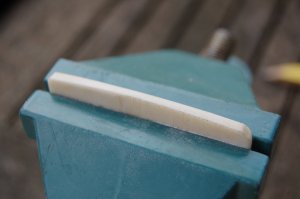
I used the radiused sanding block to shape the top edge of the bridge saddle and nut. First I covered the edge with pencil and then sanded until it was gone.

Then I strung it up to check everything aligned correctly, marked the position of the strings on the nut and saddle and filed the slots for them.

The last piece of woodworking required is to cut the control cavity and cover. I’ve been investigating ways of using a single template to cut both, to guarantee that they match exactly. I finally tracked down the approach, which involves using the 5mm cutter, a 17mm collar and a 27mm collar. I had everything except the 27mm collar so while I’m waiting for that to arrive there’s not much else to do. I’ll write up the details of how I propose to use the two collars and one cutter when I get the chance.

Minibass: cutting the neck pocket and drilling the string anchors

We’ve had intermittent heavy showers today so I haven’t made as much progress as I had hoped. First job was to cut the neck pocket, so I made myself a routing template. I clamp the neck to the MDF and draw lines along each side, extending out onto the board so that I can draw on a centre line. This means that when I match it up to the centre line of the body everything matches up.

I then sticking a couple of guide pieces either side. At this point I unclamp the neck and tap it down into those two guides to make sure it is really snug. I then stick down the end guide.

A few passes with the top bearing cutter to follow those guides, cutting into the MDF sheet below and I’ve got a template that matches the neck dimensions.

The neck pocket needs to get routed in at an angle, so I set up a pair of guide rails, and chock up the back egdes to get the angle I want (a rise of 30mm over a distance of 600mm). The neck pocket template gets secured to the rails and the body flat to the bench below. Rout the pocket to 13mm deep at the front edge and we’re done.

While it was still off the body I trimmed the back of the neck to start the job of carving the profile. The real work on this won’t start until it is glued to the body, so I can shape the neck heel at the same time.

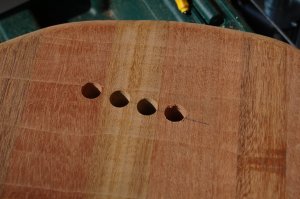
Last job of the day was to drill the holes for the string anchors. I drilled 2mm holes all the way through the body in the positions where I wanted them.

From the back I drilled 10mm holes to for the ball-ends to sit in. These are much bigger and longer than a traditional ball end so these holes are 18mm deep.

Back to the front and I drilled holes for the strings to pass through – these are matched to the individual sting gauges. Sizes are 5mm, 4.5mm, 4mm and 3.5mm.

And this final shot shows the yellow ball-ends seated in their “pockets”.

Next job is to rout the control cavity and then glue the neck on. Once that has been done I can do an initial assembly and rough setup to correctly intonate the bridge. I’ll disassemble, glue the bridge into position and then it is onto shaping the neck, sanding and application of finish.

Sorting out the Minibass neck

The aim for today was to get the neck ready to go onto the body. I started by shaping the headstock top edge (to mimic the body carve) and drilling for the tuners and ferrules.

Here’s the compact layout.
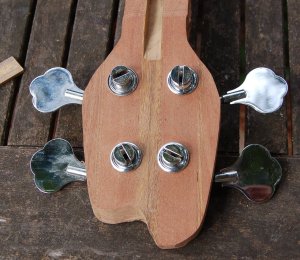
I needed to drill out the machine head slots to be able to accept the thicker strings. After drilling I spent some time with a small round file making sure there were no sharp edges which would damage the polyurethane strings.

Then it was on to the fret markers. I drilled 13mm holes along the top edge.

I had ordered a set of plug cutters but after a couple of hours of trying to get them work I was unable to cut a neat plug of hardwood. Thankfully the eBay seller is going to refund the money, but in the meantime I needed to find a way of making myself some plugs. I cut a square rod of sapele that was 13mm on each side, clamped that down to the bench and ran a 6.5mm roundover bit down each corner. After a bit of sandpaper I was left with a 13mm dowel. Pop through the fretboard and trim to length

I glued in each plug and, while they were drying, I made myself a 5mm dowel of ebony. I couldn’t do this with a router, but with a small block plane I was able to fashion a fairly good approximation from a 5x5mm length of ebony.

I drilled a 5mm hole through the centre of the 12th fret marker and glued in the ebony dowel. After allowing it to dry top and bottom of the fretboard were sanded flat.

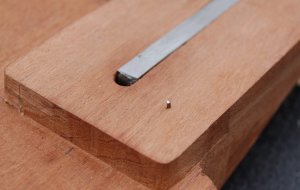
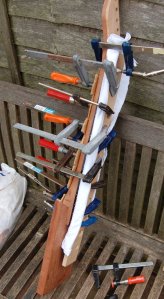
Now I had all the key tasks done I was ready to assemble the neck. I drilled two 1.5mm holes through the first and last fret slots, down a couple of mill into the neck. This allows me to pop through a couple of thin pins which stops the fretboard moving as it is clamped down. I mask off the truss rod slot, spread the neck top with two part Araldite epoxy adhesive and gently clamp it up. It doesn’t need to get clamped too tightly otherwise it can force out all of the glue, leaving a weak join.
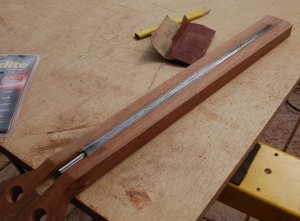
After an hour I was able to remove the clamps. I used a bottom bearing cutter in the router and trimmed the fretboard to match the neck, neatly bisecting the sapele/ebony markers. Next step was to set about the neck with my radiused sanding block, loaded first with 60 grit, rising to finish with 220 grit. To make sure I sanded the fretboard evenly I shaded the surface with pencil so I could easily see which areas were getting sanded away.

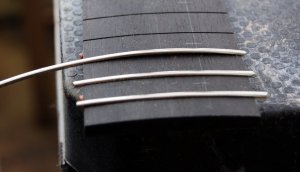
I cut the frets close to length, gently tapped them into the slots and, with my caul mounted in the drill press, gently squeezed them into the slots. This was so much easier and more controlled than hammering them in.

I clamped the edges of the frets and wicked in a drop of CA glue to each fret end.

Once that had dried I filed the fret ends. They still need more work but they’re fairly close.

If the weather allows, tomorrow I’ll be routing the neck pocket, control cavity and drilling the string through holes, hopefully ending the day with a neck glued in to the body.

Making a radiused sanding block and a fret press caul

If there’s one thing I love almost as much as building guitars, it is making the templates, tools and jigs to make guitars. Today I set out to make myself a radiused sanding block and a fret press caul. Now I could go to any of the reputable luthier suppliers, such as Stew Mac, or LMI and buy these but, because I tend to build types of guitars that you can’t buy I decided that it would be worth the investment in time to work out how to make my own – for that time when I want to build something with a 17.25″ radius.

I had spent a few hours researching ideas for making a radiused sanding block. Most of them are router based, either routing the curve into a single piece of wood, or routing several slices which are then glued together. I tried a couple of these approaches with limited success (i.e. they were a complete disaster). I then hit on a solution I hadn’t seen anywhere else – to use my bandsaw. I clamped a piece of MDF to the bandsaw’s table. I drilled a 4mm hole 12″ from the blade. I then drilled a series of 4mm holes at 30mm intervals in a length of 75mm wide 18mm thick MDF. I popped the drill bit through the holes and hey presto it cuts a 12″ radius into the other end, step to the next hole and cut the next, and the next and the next. I put the first one to one side (more on this later) and glued the remaining eight slices together. Hey presto 12″ radius sanding block.

Last time I made a neck I tapped in the frets with a leather faced hammer and, whilst it worked, it left me with a big job of fret levelling. This time I’m going to have a go at using my drill press and a caul, to press the frets into place. Hopefully this way I can be much more consistent with the fit of each.

I took the first piece of radiused MDF and drilled a 22mm hole through the face, and an 8mm hole from the edge to meet the larger hole. This allowed me to fit a threaded rod and a couple of threaded plugs (both rescued from a long gone Ikea bed) onto it to create a post that can chuck into the drill press. Hey, once again, presto.

Voodoo Tele: Big leap forward

I’ve made excellent progress today.

Late yesterday I fixed the fretboard to the neck. First I popped in a couple of panel pins and snipped the heads off. This gives me something to locate the fretboard against, to stop it slipping when glued up and the pressure of the clamps is applied.

After greasing the truss rod ends and apply a thin bead of silicone (aka caulk) into the channel, I masked off the truss rod channel, applied the araldite epoxy, removed the masking tape and then fitted the fretboard and clamped it up. The masking tape is to ensure that the epoxy doesn’t squeeze over into the truss rod channel.

And here’s how it came out.

Next I used this small diamond file to clean up the fret ends.

Then I was on to gluing the maple cap sides together.

And while the cap glue joint dried I shaped the neck. First going “old school” with a spokeshave, then rasps, finishing with 40 grit sandpaper. It is difficult to tell from these pictures but I’ve gone for a fairly conservative “C” profile, but with a hint of assymetric “V” shape on the treble side.

Once I was happy with the rough shaping of the neck I glued it into the body.

And then re-routed the body chamber shapes into the neck tenon.

And this is what I was left with at the end of a hard day’s work.

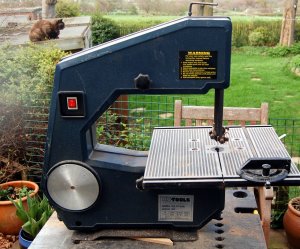
Almost as pleasing as this was getting the parts for the old bandsaw and getting that working again.

And then, to cap off the day, I got confirmation from a kind and talented Baltimore artist, called Jilly Yoffe, that I can use one of her “Dia de Los Muertos” pictures as a headstock logo. Wahay! Result!

FretBoard for iPhone

In 1997 I wrote a small app for the old 3com Palm Pilot (remember those?) and I released it on my own special licence – DWTFYWWI v1.0. This is somewhat along the lines of GPL, but with even fewer restrictions. It stands for “Do What The F— You Want With It”.

Here’s a screenshot;

I thought this app had disappeared without trace when, lo and behold, I find it still survives as an iPhone app! What great news. It has made my day.

Head over to http://fretboard.mennigmann.com/ for more info. As you can see, the app is MUCH prettier and MUCH improved, but it is great to see my original idea still alive.

Voodoo Tele: Fretting the neck

First job today was to redo a couple of yesterday’s side dots that I wasn’t happy with, and then it was on to fretting the neck.

First I made a simple fretwire bender. I used the new router’s circular cut jig to trim the end of a piece of 12mm MDF to an 8.25″ radius. My fretboard radius is 10″ so I need the wire bent to a slightly tighter curve.

I then cut a slot across the top with a junior hacksaw and, hey presto, fret bender.

Once bent I tapped in the two ends…

…trimmed it to length…

…and then finished seating the fret with three or four firm strikes with my copper hammer.

After that I clamped each edge of the frets and wicked in some CA glue to hold the fret ends.

I saw this technique posted in a thread over at TDPRI, showing how PRS do their frets. If it is good enough for Carlos, then it is good enough for me.

Voodoo Telecaster: Cutting the fretboard and installing the dots

We’ve had heavy rain on and off for the last couple of days so not too much progress, but in the the breaks between downpours I managed to drag all the tools out and get the ebony fretboard cut close to shape. I first clamped it up to the neck, and marked the underside with pencil. I transferred the marks to the top side and then ran it through the bandsaw, keeping 1-2mm outside the line.

I had thought about mounting it onto the neck and using the flush cut trimmer in the router but, because of my inexperience with ebony, and the fact that I have no scrap pieces for practice, I chickened out and took the prudent approach – cut it close and then sand it down.

Last job before the fretboard gets epoxied on to the neck was to install the marker dots. I had been scavenging around for a couple of days looking for interesting materials that I could use. The favourite was going to be a yellow cocktail stirrer until I found a scrap of 2mm diameter copper.

I drilled the 2mm holes at the relevant locations, put in a dab of thin superglue (aka CA glue), and pushed the copper rod in, snipping off excess with my wire cutters.

It took a matter of minutes to remove excess material with a diamond file. Job done.

Tomorrow I hope to installing the truss rod and glue the fretboard to the neck. After that I’ll finish shaping the neck to the final dimensions, before heading into the the new scary world of fretting.

And if you ever happen to be using power tools, please don’t forget to take a minute to put the safety gear on. I managed to find a chunk of the router’s exploded bearing housing about 40 feet away from where I was working. Imagine this hitting an unprotected body part…